Back up your photos in 4 easy steps
I did it! I finally backed up the past two years' photos!
I admit that I'm behind because I don't want you to feel guilty, or like you're the only person who procrastinates. I procrastinate just like anybody else! In an ideal world, we would back up our important files, like photos, at least once a month. Some people have a backup or scanning day on the last Sunday of the month. A regular schedule can be easy — it's getting started that's hard.
1. Select your storage: online service (the "cloud"), external hard drive, CD or DVD, etc.
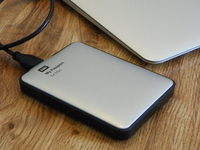
I used to back up digital pictures on CDs, but they'll be obsolete in the near future as new computers don't even have CD drives. Now I prefer an external hard drive (EHD) because it has plenty of space and I have control over it (not some company that can go bankrupt or raise their rates). Compared with monthly plans for online storage, the EHD will pay for itself in half a year.
If you don't have a ton of pictures, try one of the free online services like Google drive or DropBox (free for smaller storage). New Mac owners can use iCloud for free. I don't recommend one of the photo-printing companies for backup, because they charge fees to download your own pictures. However, they're better than no backup at all.
2. Download pictures off your camera.
I'm always astonished at people who consider a camera chip to be their main storage. Perhaps that's because my first digital cameras were shared work cameras, and any pictures left in the camera were subject to be deleted by someone else. Keeping pictures on my computer is the only way I know to organize them (in folders with file names or using photo software), print them, search for them later by name or date... everything I need to do. Some people can print from those little cards and even edit on their cameras, but I prefer to edit on a bigger screen.
3. Back up your digital photos.
Now that your pictures are on your computer, back them up using whatever system you decided in step 1. Open some of those backup files to make sure the pictures copied correctly.
4. Delete the pictures on your camera.
My camera isn't my main storage, but it's my first backup. Now that I have two copies of every picture in two different places (one on my laptop and one on my portable EHD), I wipe the camera. Believe me, it'll make your camera happier! Mine gets really slow, especially when downloading, when it has too many pictures on it. Our old work camera got moody (sometimes refusing to turn on and take pictures!) when it hadn't been cleared in months of heavy use. It always worked fine after deleting pictures. Just be sure you've backed them up.
My newsletter subscribers received this article, a free border ideas sheet (pdf file) including a "Sand and Surf" border, heads up on the new Now Boarding Fast2Fab travel album, and information on the latest CM incentive (free products with a minimum purchase). Don't miss out on another newsletter — sign up today!


Comments
Post a Comment